CWI & NDT SERVICES
Justin Bryan
- AWS CWI
- level II PT, MT, UT
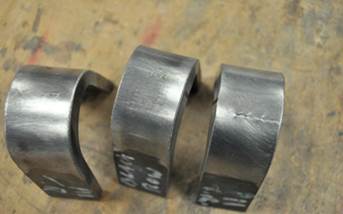
Guided Bend Test To Qualify Your Welders
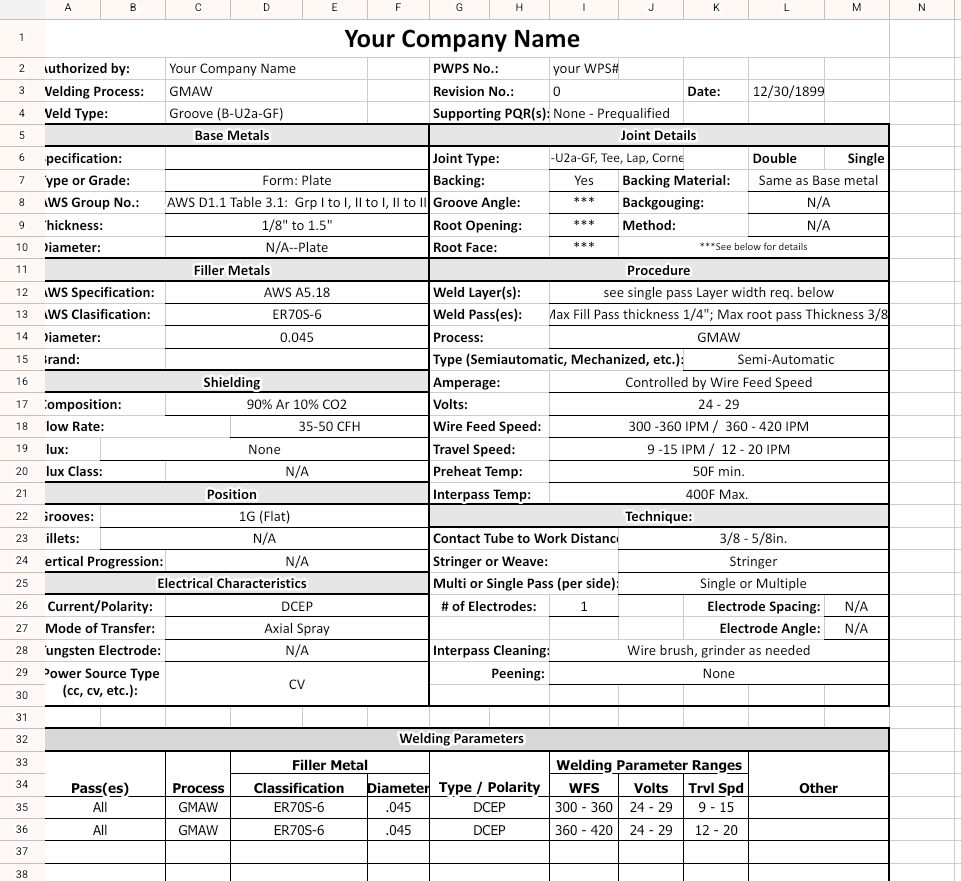
CWI Consultations For Custom WPS's
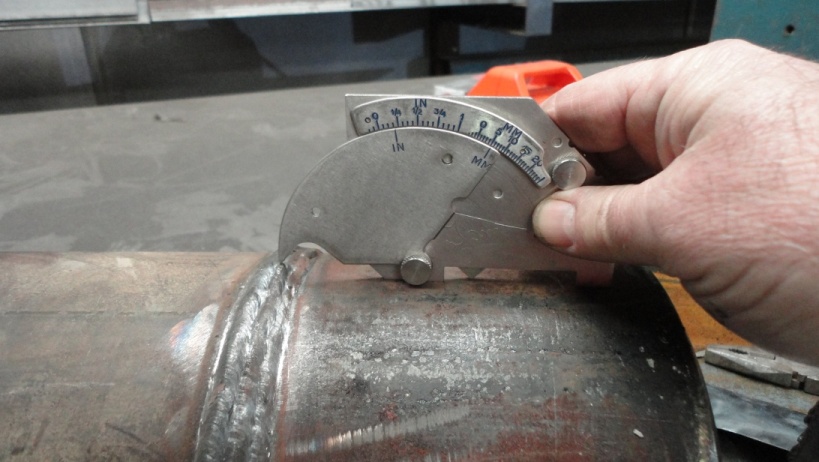
Visual Testing by AWS Certified Welding Inspector
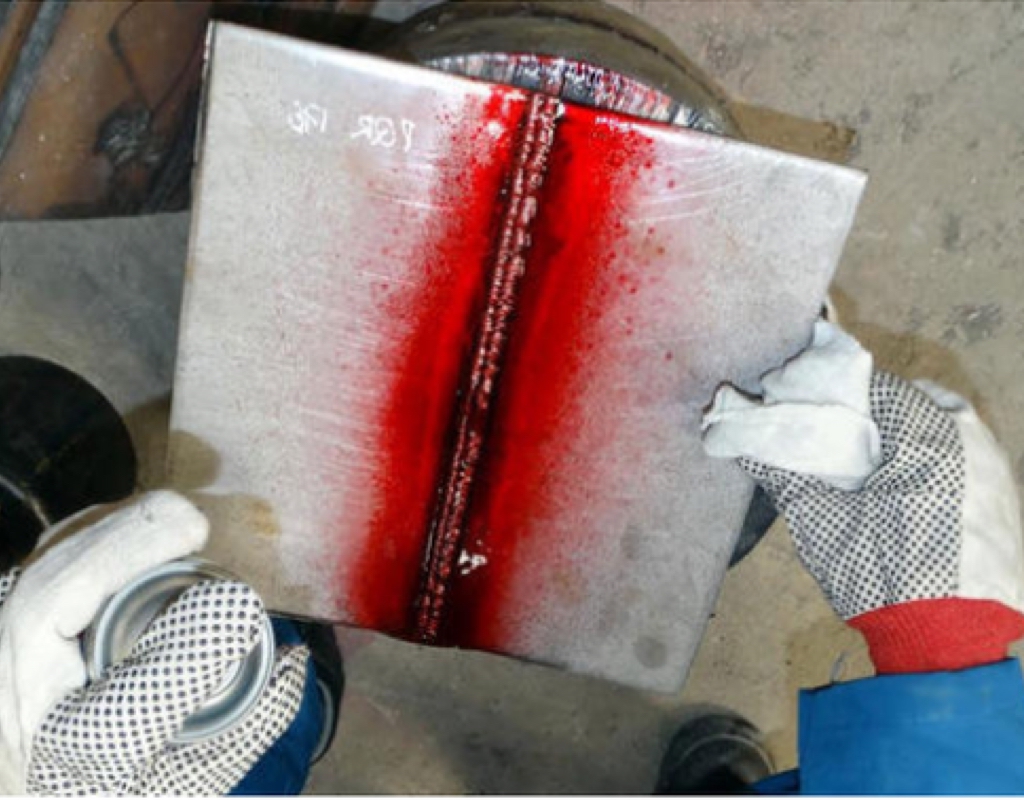
PT Inspection by SNT-TC-1A Level 2 Certified Inspector
(coming soon)
MT Inspection by SNT-TC-1A Level 2 Certified Inspector
(coming soon)
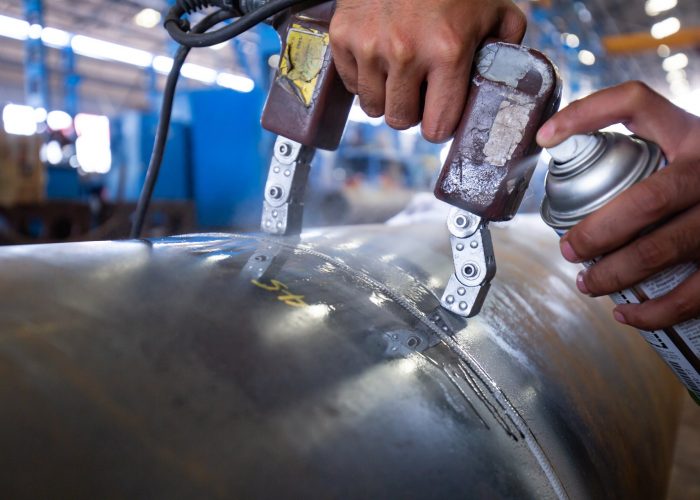
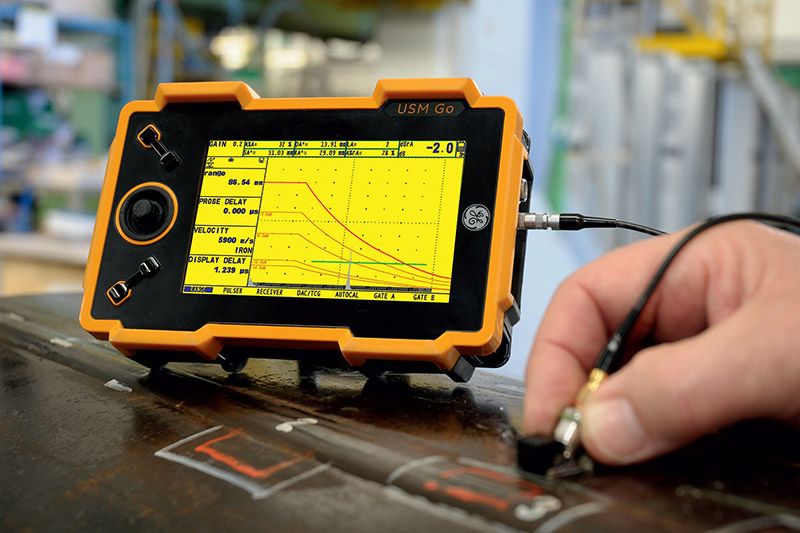
UT Inspection by SNT-TC-1A Level 2 Certified Inspector
(coming soon)
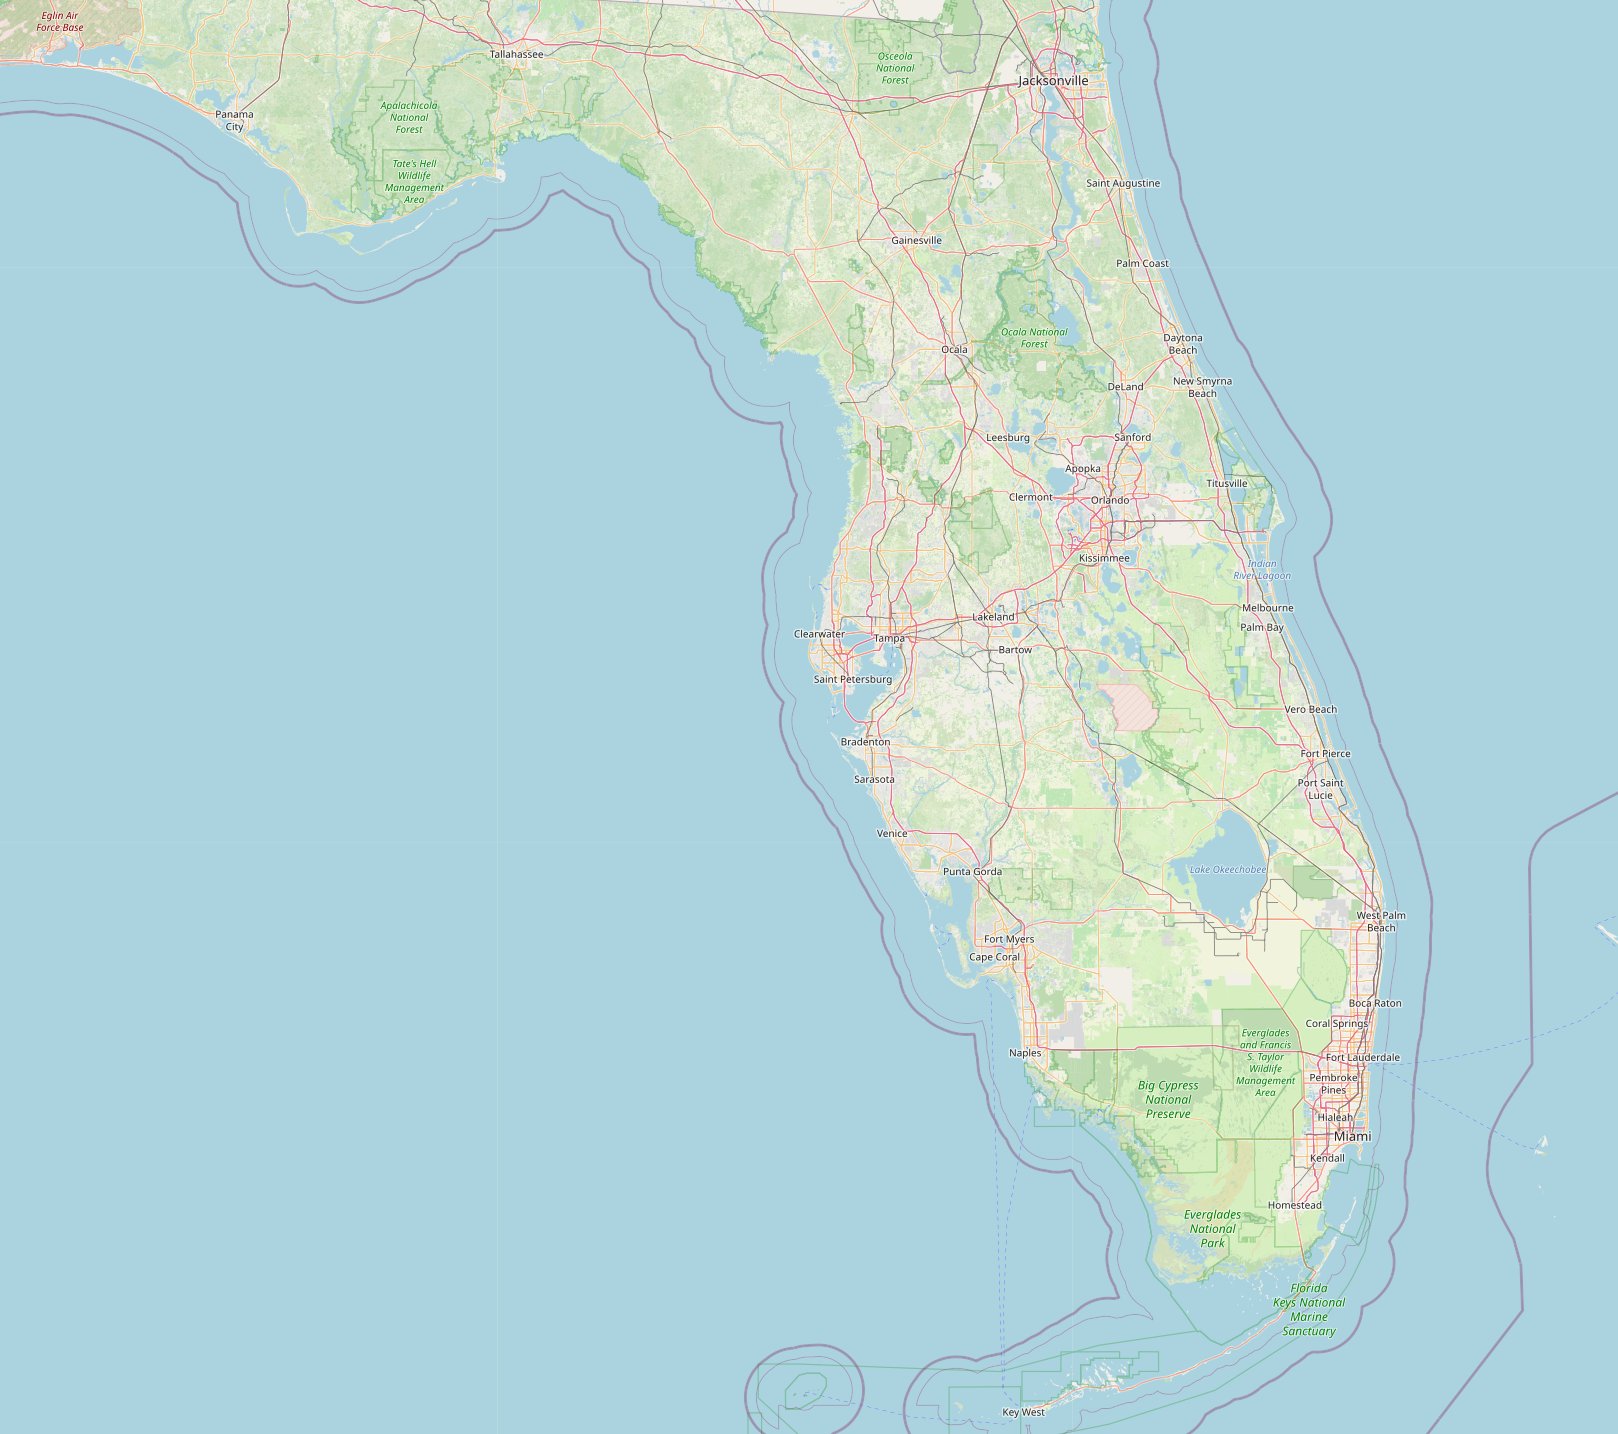
Service Areas in Florida
We proudly serve the following areas in Florida:
In-Town Service Areas:
- Largo, FL
- Palm Harbor, FL
- Bradenton, FL
- Sarasota, FL
- Pinellas Park, FL
- Clearwater, FL
- St. Petersburg, FL
- Tampa, FL
- Dunedin, FL
- Safety Harbor, FL
- Tarpon Springs, FL
- Seminole, FL
- Brandon, FL
- Riverview, FL
- Plant City, FL
- Wesley Chapel, FL
- Zephyrhills, FL
- Land O' Lakes, FL
- Lutz, FL
- New Port Richey, FL
- Holiday, FL
- Temple Terrace, FL
- Valrico, FL
- Ruskin, FL
- Apollo Beach, FL
- Sun City Center, FL
- Gibsonton, FL
- Thonotosassa, FL
- Seffner, FL
- Oldsmar, FL
- Lakeland, FL
- Lakeland Highlands, FL
- Bayshore Gardens, FL
- Winter Haven, FL
- Polk City, FL
- Bartow, FL
 GEO
GEO
BLOG
By: Justin Bryan
A compilation of free resources and helpful information.
CLICK HERE
Welding Certifications
Welding certifications are valuable credentials that validate the skills and knowledge of welders in various industries. These certifications provide assurance to employers and clients that a welder has met specific industry standards and possesses the necessary expertise to perform high-quality welds. Here are some key aspects to know about welding certifications:
1. Certification Bodies
Certifications are typically issued by recognized organizations such as the American Welding Society (AWS), the International Institute of Welding (IIW), or specific regulatory bodies in different countries. These organizations establish standards and guidelines for certification programs.
2. Types of Certifications
There are multiple types of welding certifications, depending on the specific welding process, materials, and positions being tested. Some common certifications include Certified Welding Inspector (CWI), Certified Welding Educator (CWE), Certified Welding Supervisor (CWS), and various welder performance qualifications.
3. Welder Performance Qualifications
Welder performance qualifications, commonly known as "welder certifications," are specific to individual welders. These certifications indicate their ability to produce quality welds as per established codes and standards. They involve testing the welder's skills through practical examinations, often conducted by certified welding inspectors or examiners.
4. Certification Tests
Certification tests evaluate a welder's abilities in specific welding processes and positions. These tests typically involve visual inspection of welds, destructive testing of samples, and assessments based on applicable codes and procedures. Welders need to demonstrate their competency in producing welds that meet the specified requirements for factors like soundness, strength, and appearance.
5. Codes and Standards
Certifications are often based on specific codes and standards relevant to the industry or application. These codes outline welding techniques, materials, quality control measures, and safety requirements. Some widely recognized codes include AWS D1.1 (structural welding), ASME Section IX (pressure vessels and boilers), and API 1104 (pipeline welding).
6. Recertification
Welding certifications are typically valid for a certain period, ranging from six months to several years, depending on the certification and requirements set by the certifying body. To maintain certification, welders may need to periodically undergo recertification tests to ensure their skills and knowledge are up to date.
7. Industry Acceptance
Different industries have varying requirements and preferences for welding certifications. Some sectors, such as construction, manufacturing, and aerospace, tend to place significant emphasis on certified welders. Knowing the specific certification requirements of the industry you wish to work in can provide a competitive advantage when seeking employment.
Obtaining welding certifications demonstrates a commitment to professionalism, quality, and safety in the welding trade. These credentials can help welders secure better job opportunities, negotiate higher wages, and earn the trust of clients and employers. They also encourage ongoing skill development and knowledge enhancement within the welding field.
What are welding symbols?
Welding symbols are the written language of welders. They are how engineers describe exactly how a part is to be welded. They describe the joint preparation, the weld size, the finishing method and, any other requirements according to the project or standard being adhered to. They are capable of describing NDT methods as well as welding process to be used.
It is imperative that welders understand them. It was my experience during the hiring process that there isn't very many ways to test a welder's knowledge of symbols, so I devized this symbol test to solve this problem. Generally, what I would do is give them this test to take while I prepare the machine for their test (I always zero out their machine first but that's a topic for another article).
Welding Symbol Test
An oversimplified walk-through on creating a WPS (Welding Procedure Specification)
By: Justin Bryan
To those who have never done it, writing a code compliant WPS seems like a daunting task. Truth be told your first one probably will be. My goal here is to ease some of that pain.
What is a WPS?
A welding Procedure specification is just a document with a range of variables designed to create successful welds repeatedly. The point is, so that we can have multiple welders weld the same way. As a welder the WPS is the law. It is the set of rules we follow. We take welding variables from pre-qualified or qualified data (see below), and expand them to fit a reasonable range of applications but within parameters of change layed out by whatever standard we are fabricating to.
Pre Qualified vs Qualified
Prequalified WPS's do not require any testing (though it won't hurt). The data required to write them is included in the code. Qualified WPS's get the data they are based on, from a document called a PQR (procedure qualification record). A PQR is a record of testing done to a sample of a weldment to prove that the variables being used can produce a weld with the desired attributes.
Essential variables
Once we have this data we need to parse through what our code considers "essential". In the case of AWS D1.1 its pretty simple because it is layed out in a table. The main takeaway here is that, everything that our code deems "essential" is on our procedure, and that the values are within the parameters set out by the code.
Helpful tips
Make it with as wide of a scopescope as possible. Make it easy to read. Make it short, no more then two pages. I will be releasing templates in excel format that will save you hours of time because you will only have to change or add a few essential variables (depending on the code) and just fill in the blanks. But if you need a little help feel free to Contact Me for a quote.
WPS TemplateI hope this will help get you started. I am providing this for educational purposes and take no responsibility for what you do with it. If you require assistance qualifying a procedure or simply writing a pre-qualified one, please get in touch, and let me know! I'm here to help and would love to offer a quote.
VT inspection training
Visual inspection also known as visual testing, VT for short is often overlooked as a viable method in a weld quality program. But most issues that arrive in other NDT methods can be discovered with VT.
Assuming of course the VT is done properly It is the first line of defense. One thing anybody notices when they do a lot of weld inspection is that the routiness of the inspections inherently brings overall quality up, so if every weld gets VT, At some point the pass rates for other NDT methods also increase.
It is imperative that welders who train to VT and to understand the accepting criteria to the standard they are working for. This is not the case at most companies. We can train your welders to be Every equivalent to a level 2 VT inspector.
Just like other NDT methods, the most important part of VT is the documentation. Because if it's not documented it never happened. There are many pre-made forms in PDF to make the documentation easier but, I find that a slow way to do anything. So I made this FREE VT report Google sheet template. And with a little spreadsheet magic a Inspection log form like the one from the earlier post. Can auto populate this sheet. Work smarter. Not harder.
VT Report Template
The inspection Log
One of the biggest challenges to being a welding inspector is taking detailed notes in a way that it doesn't consume too much time and that you can easily search through at a later time. The solution I found is this This is Google form I made that helps me take detailed notes on the fly, while keeping them searchable in a spreadsheet for later review, analysis, or completion of any quality reports that involve periodic inspections over time. It is helpful to be able to look back at every time I inspected a particular job when releasing it from a final inspection.
Inspection Log
Ultrasonic Testing Basics
-
Inspection procedure
Weld inspection using UT typically involves several steps:
- Initial straight beam scan to check for laminations near the weld
- Angle beam scans from multiple directions to examine the entire weld volume
- Scans of the heat-affected zone on both sides of the weld
- Additional focused scans of any suspicious indications
The exact procedure may vary based on weld type, material, and applicable codes or standards.
-
Equipment and setup
For weld inspection, key equipment includes:
- An ultrasonic flaw detector with angle beam capability
- Angle beam transducers (typically 45°, 60°, and 70°)
- Calibration blocks specific to the material and weld geometry
- Couplant gel
Proper equipment calibration and sensitivity settings are crucial for accurate results.
-
Defect detection capabilities
UT is highly effective at detecting common weld defects including:
- Lack of fusion and lack of penetration
- Cracks (both longitudinal and transverse)
- Porosity and slag inclusions
- Undercut and root concavity
The method can detect both surface and subsurface flaws, with high sensitivity to planar defects like cracks.
-
Interpretation and analysis
Interpreting UT results for welds requires significant skill and experience. Inspectors must:
- Differentiate between actual defects and geometric reflectors
- Characterize flaw type, size, and orientation
- Determine if indications exceed allowable limits per applicable codes
Advanced techniques like phased array UT can provide more detailed imaging to aid interpretation.
-
Advantages for weld inspection
UT offers several benefits for weld testing:
- Single-sided access is often sufficient
- No radiation hazards compared to radiographic testing
- Capable of precise flaw sizing and location
- Immediate results allow for on-site decisions
- Effective for thick sections where radiography may be limited
-
Limitations and challenges
Some challenges in UT weld inspection include:
- Difficulty with certain weld geometries (e.g., austenitic stainless steel welds)
- Surface condition can affect coupling and results
- Operator-dependent results require well-trained personnel
- May struggle to characterize volumetric flaws compared to radiography
- Reference standards and procedure qualification often needed for critical applications
Give us a call today to learn more about how we can help you with your ultrasonic testing needs.
Magnetic Particle Testing (Yoke Method) Basics
1. Basic Principles
- MPI uses magnetic fields to detect surface and near-surface defects in ferromagnetic materials like steel welds.
- A magnetic field is applied to the test area using an electromagnetic or permanent magnet yoke.
- If defects are present, they disrupt the magnetic field, causing magnetic particles to gather and form visible indications.
2. Yoke Method
- The yoke is a U-shaped electromagnet or permanent magnet placed on the test surface.
- It creates a magnetic field between its two poles.
- Electromagnetic yokes are more common as they allow adjustable field strength and easy on/off operation.
3. Inspection Process
- Clean and prepare the weld surface.
- Position the yoke across the weld area.
- Apply magnetic particles (dry powder or wet suspension) while the magnetic field is active.
- Inspect for particle accumulations indicating defects.
- Rotate the yoke 90° and repeat to detect defects in all orientations.
4. Advantages
- Portable and suitable for field inspections.
- Can detect surface and slightly subsurface defects.
- Effective for inspecting welds in various positions and geometries.
5. Limitations
- Only works on ferromagnetic materials.
- Limited penetration depth (generally up to 1/4 inch).
- Requires good surface preparation.
6. Common Weld Defects Detected
- Cracks
- Lack of fusion
- Porosity
- Slag inclusions
- Undercuts
7. Inspector Considerations
- Proper training and certification required (e.g., ASNT, ISO 9712).
- Understanding of welding processes and defects.
- Knowledge of applicable codes and standards (e.g., ASME, AWS).
- Ability to interpret indications and distinguish between relevant and non-relevant indications.
8. Safety
- Follow proper procedures for handling magnetic fields.
- Use appropriate personal protective equipment.
- Be aware of potential interference with electronic devices.
9. Documentation
- Record test parameters, results, and any indications found.
- Provide clear reports for quality control and client records.
<\P>
Basics of Dye Penetrant Testing (PT) for Weld Inspectors
1. Basic Principle
- PT is a non-destructive testing method used to detect surface-breaking defects in welds and other materials.
- It relies on capillary action to draw a colored or fluorescent dye into surface discontinuities.
2. Main Steps
- Pre-cleaning: Thoroughly clean the test surface to remove contaminants.
- Penetrant application: Apply dye penetrant and allow it to dwell (typically 5-30 minutes).
- Excess penetrant removal: Carefully remove excess penetrant from the surface.
- Developer application: Apply a white developer to draw out penetrant from defects.
- Inspection: Examine under proper lighting to detect indications.
3. Types of Penetrants
- Visible dye (typically red) for inspection under white light
- Fluorescent dye for inspection under ultraviolet light
4. Advantages for Weld Inspection
- Can detect very small surface-breaking defects
- Applicable to most materials and weld types
- Relatively low-cost and simple to perform
- Portable for field use
5. Limitations
- Only detects surface-breaking defects, not subsurface flaws
- Not suitable for porous materials
- Proper surface preparation is critical
- Chemical handling and disposal considerations
6. Common Weld Defects Detectable
- Surface cracks
- Porosity open to the surface
- Lack of fusion defects
- Undercut
7. Important Considerations
- Follow proper procedures and dwell times
- Use compatible penetrant systems (penetrant, cleaner, developer)
- Ensure proper lighting conditions for inspection
- Be aware of potential false indications from surface roughness
8. Inspector Qualifications
- Proper training and certification (e.g., ASNT, PCN) is typically required
- Understanding of welding processes and potential defects is beneficial
By mastering these basics, weld inspectors can effectively use dye penetrant testing to detect and evaluate surface defects in welds.
Understanding 1st, 2nd, and 3rd Party Welding Inspection
Welding inspection is crucial for ensuring the quality and safety of welded structures. There are three main types of welding inspection: first-party, second-party, and third-party. Each has its own definition, challenges, and benefits.
First-Party Welding Inspection
Definition: Conducted by the equipment manufacturer or vendor themselves.
Challenges:
- Potential bias due to self-inspection
- Limited oversight may miss critical defects
Benefits:
- Direct control over the inspection process
- Cost-effective as it doesn't require external inspectors
Second-Party Welding Inspection
Definition: Performed by the equipment buyer or purchaser.
Challenges:
- Requires buyers to have technical expertise
- Potential for disputes between buyer and vendor
Benefits:
- Ensures products meet specific customer requirements
- Provides direct communication between buyer and vendor
Third-Party Welding Inspection
Definition: Conducted by an independent inspection company hired by either the buyer or seller.
Challenges:
- Can be more expensive due to hiring external inspectors
- Potential delays in logistics coordination
Benefits:
- Ensures objective and unbiased inspection results
- Enhances credibility with adherence to international standards
In conclusion, each type of welding inspection has its place in quality control processes. While first-party inspection offers cost benefits, third-party inspection provides the highest level of impartiality and credibility. The choice depends on project requirements, budget constraints, and desired level of quality assurance.
